
My Walk-In Closet, Week Three Progress (Plus, Flooring Options Using The Bona Flooring Visualizer On My Closet Pictures)
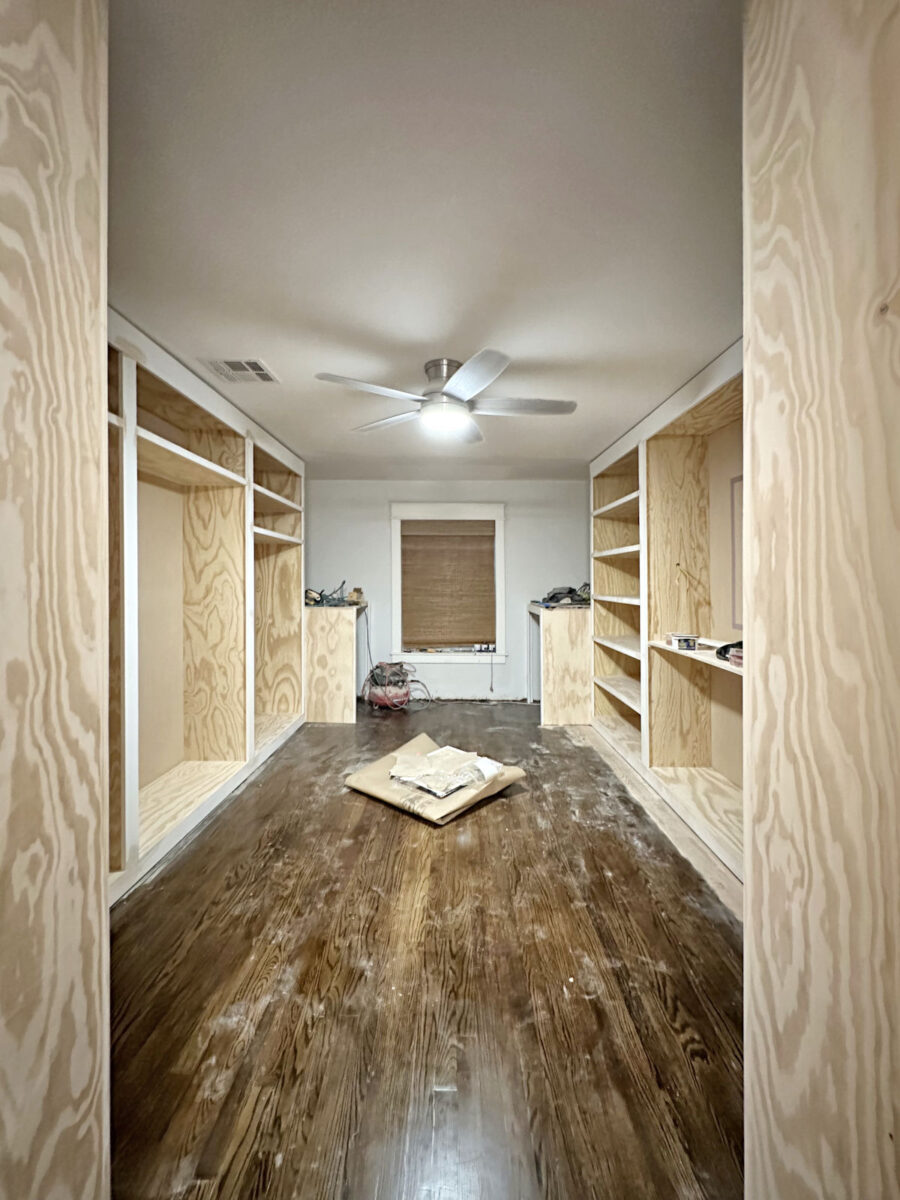
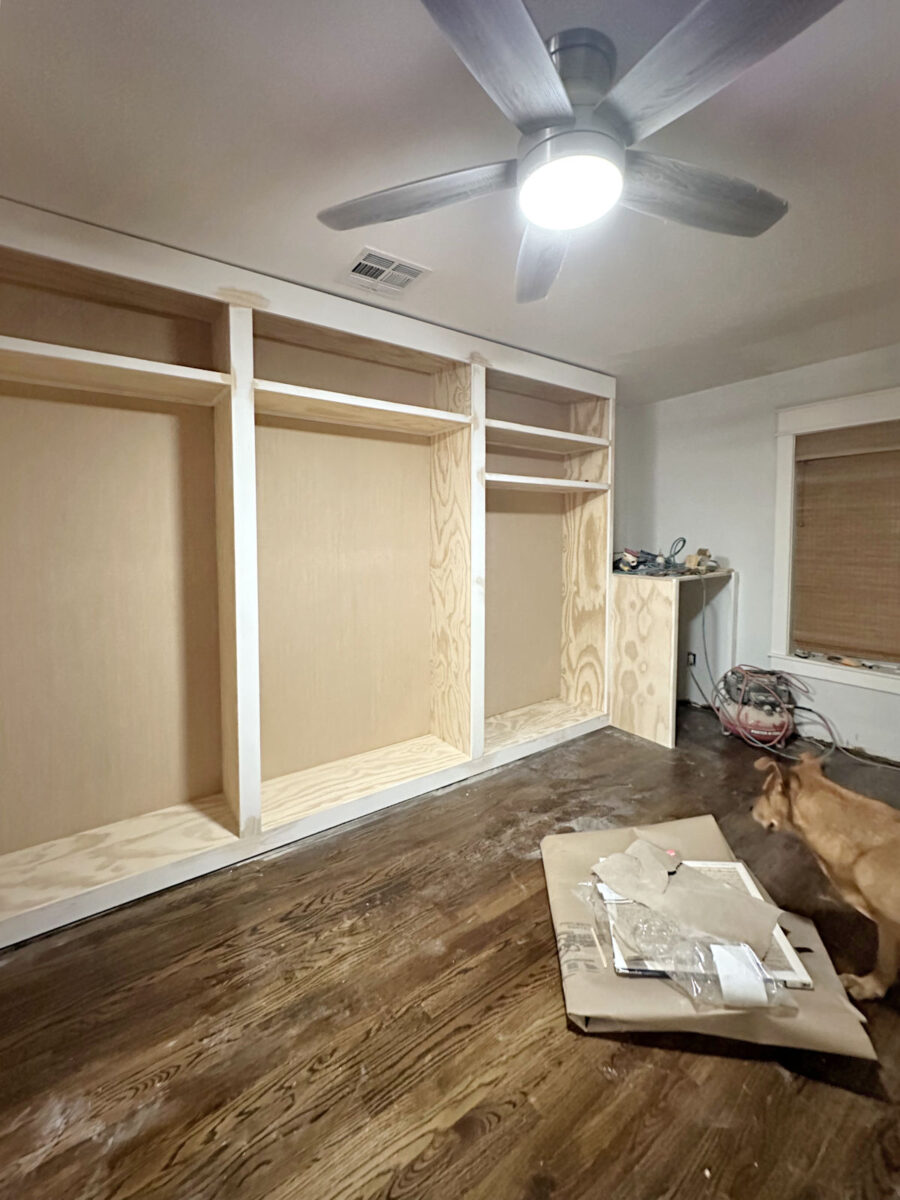
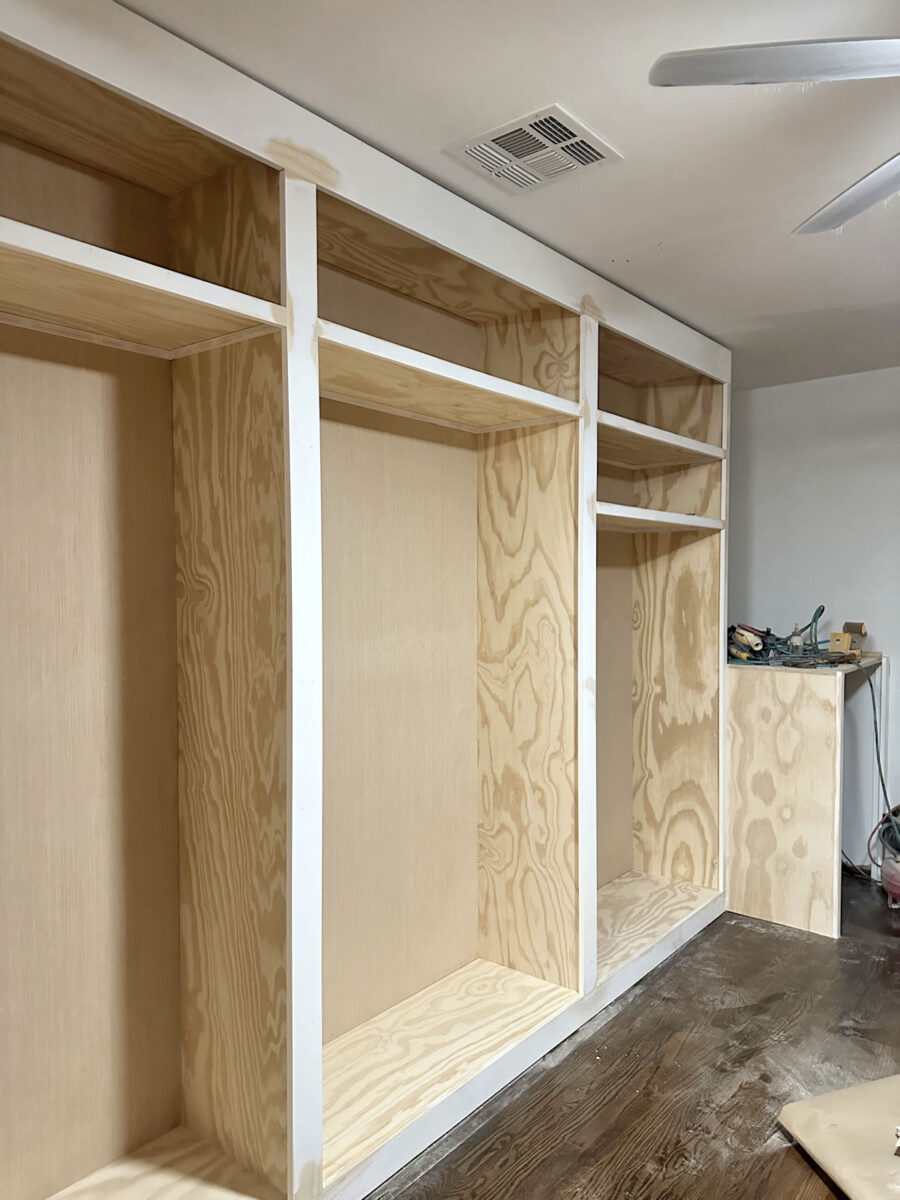
I have reached the end of week three of working in my combination of dressing room and laundry room. And although progress seems to have decreased a lot this week, that is just because I got to the part of the process that takes longer. But these tedious steps are also the most important to obtain a magnificent final result. I spent all day sanding, sanding, and sanding a little more. And I am so happy that at the end of the day, have all the sandwhich, all the aspirated dust, and now I am ready to prepare and calafe.
He had already made a ton of wood filling, using wood filling to fill each nail hole, screw and joint hole. I went through a large wooden filling bathtub (This is the one that uses – Affiliate link) Only in that part of the project alone. That adds to the two large wooden fill bathtubs that I had used only preparing the individual pieces of plywood, since I decided to use a smaller degree of plywood in an effort to save money.
And because it slows me considerably when my little 5 -inch orbital sander hooked to my shopvac, I decided to give up the shopvac and let the dust fly to be able to do it faster. Fortunately, the outer temperature was quite pleasant, so I could close the HVAC, open the windows and close the doors to the main bedroom suite to keep the dust contained in that area of the house. There are few things that I hate more than having to work with gloves and/or a mask, but not mask, it was not even an option yesterday.
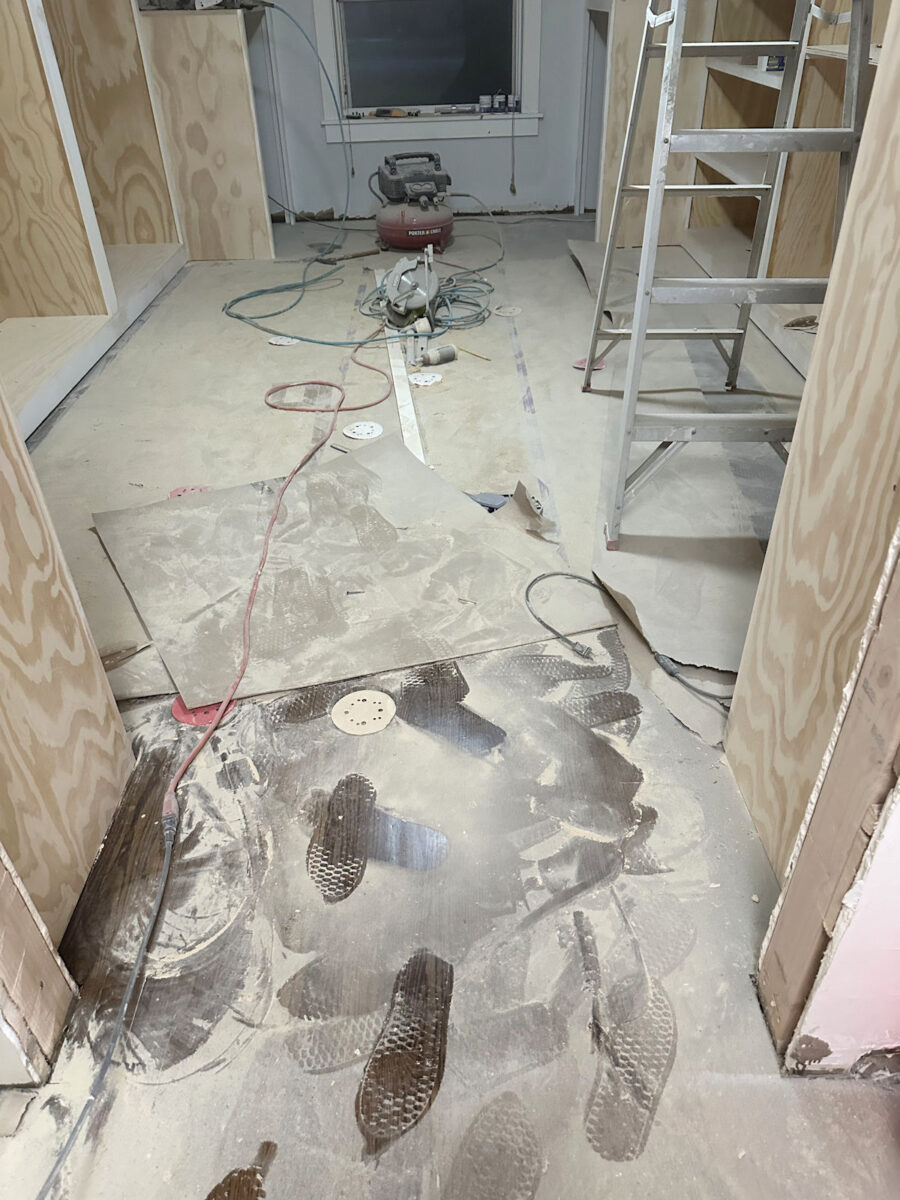
After sanding the whole day and preparing the cabinets for primer and calafateo, this is the disaster that remained at the end of the day …
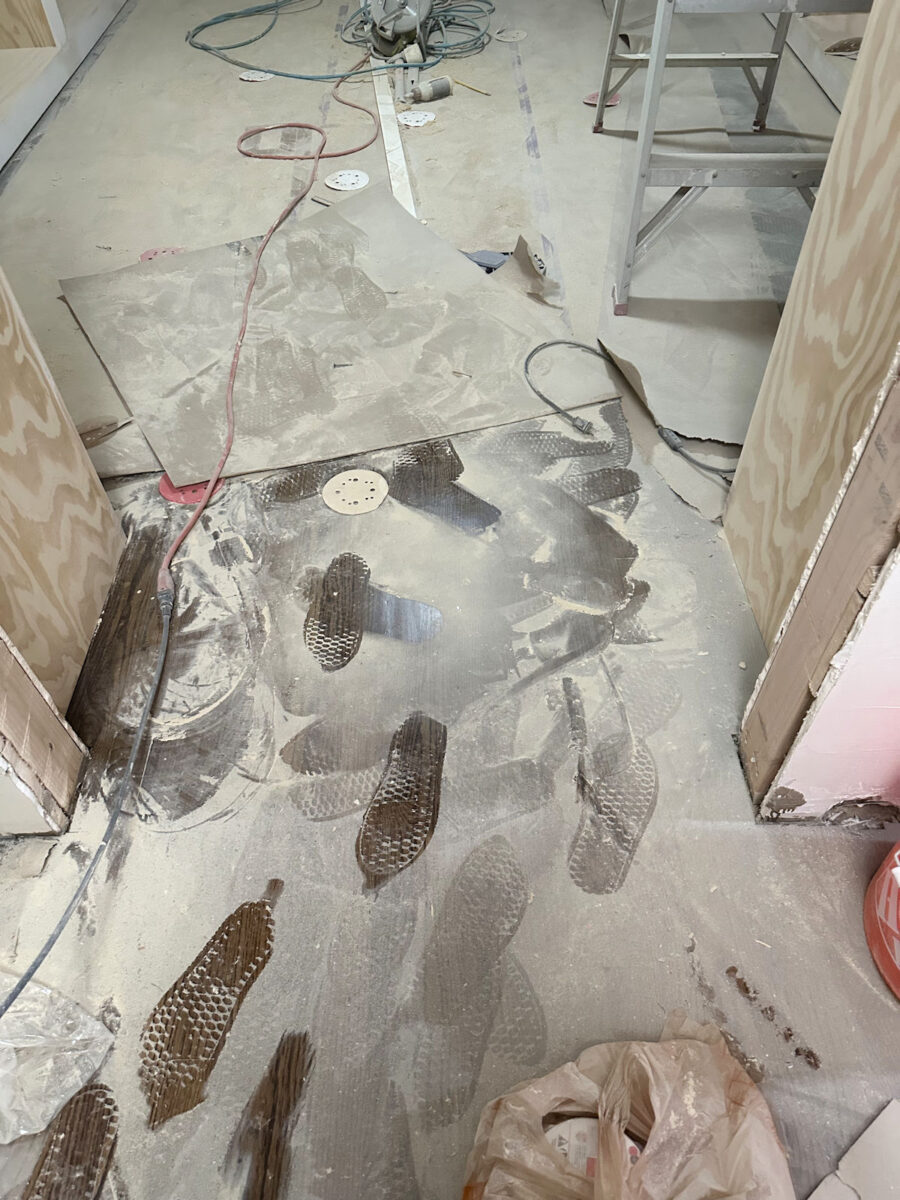
It was a great job to prepare all that dust, but cleaning the dust was still much easier than trying to sand everything with my sander together with a shopvac all day.
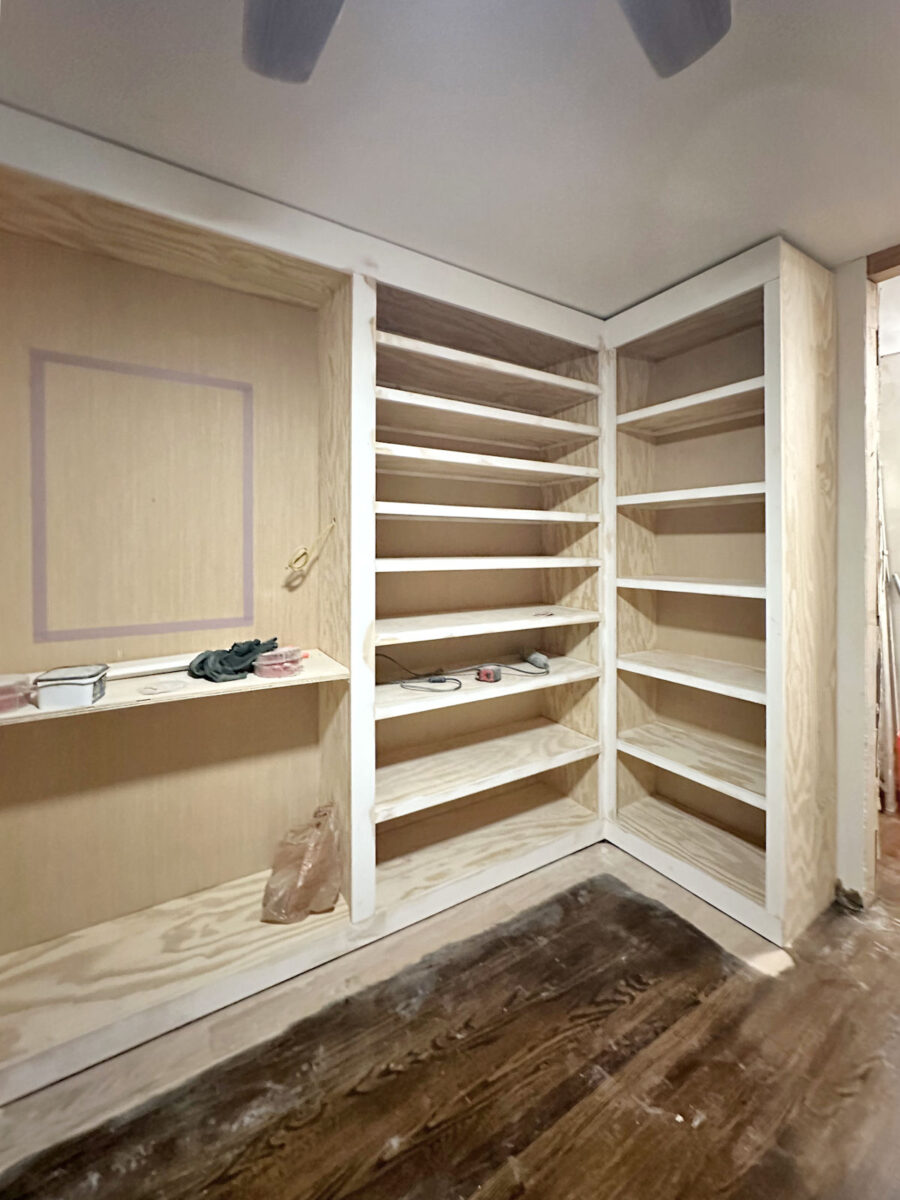
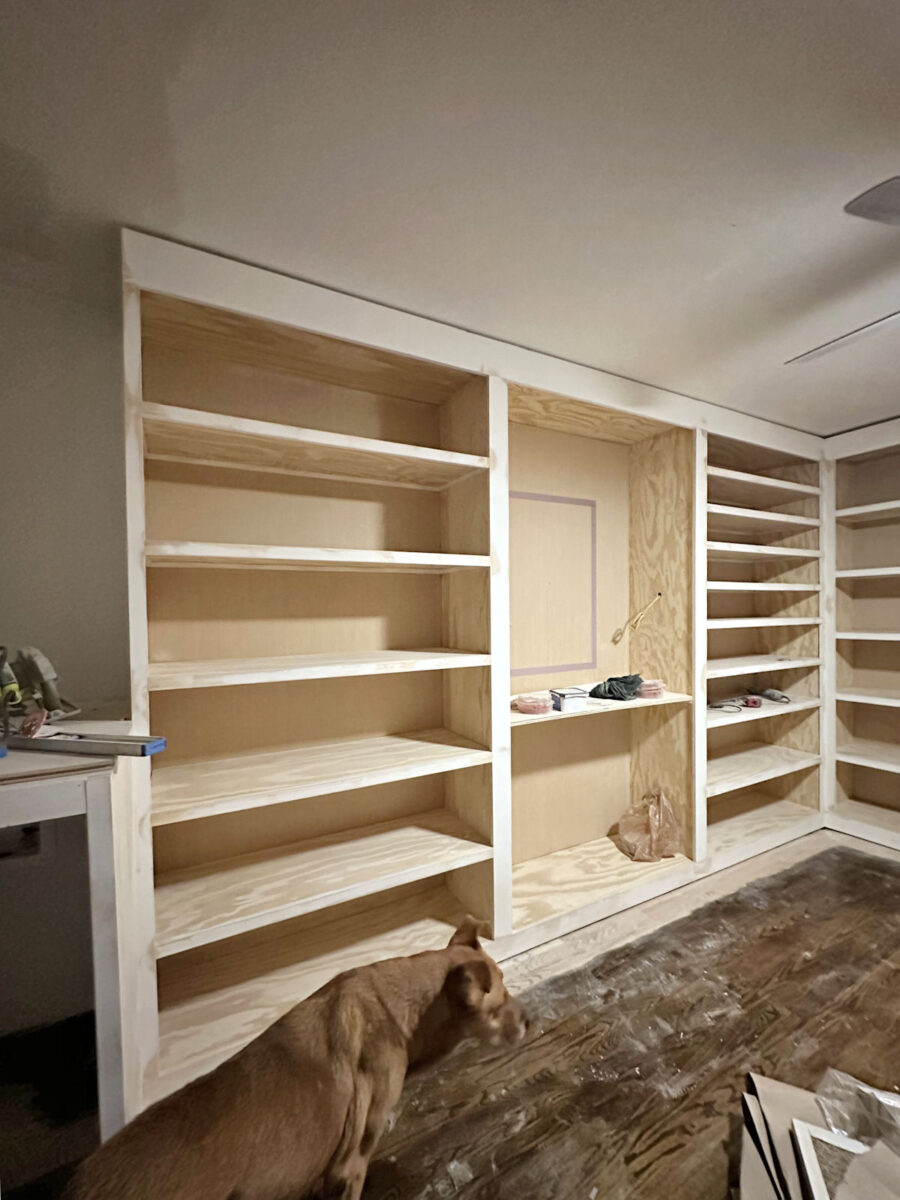
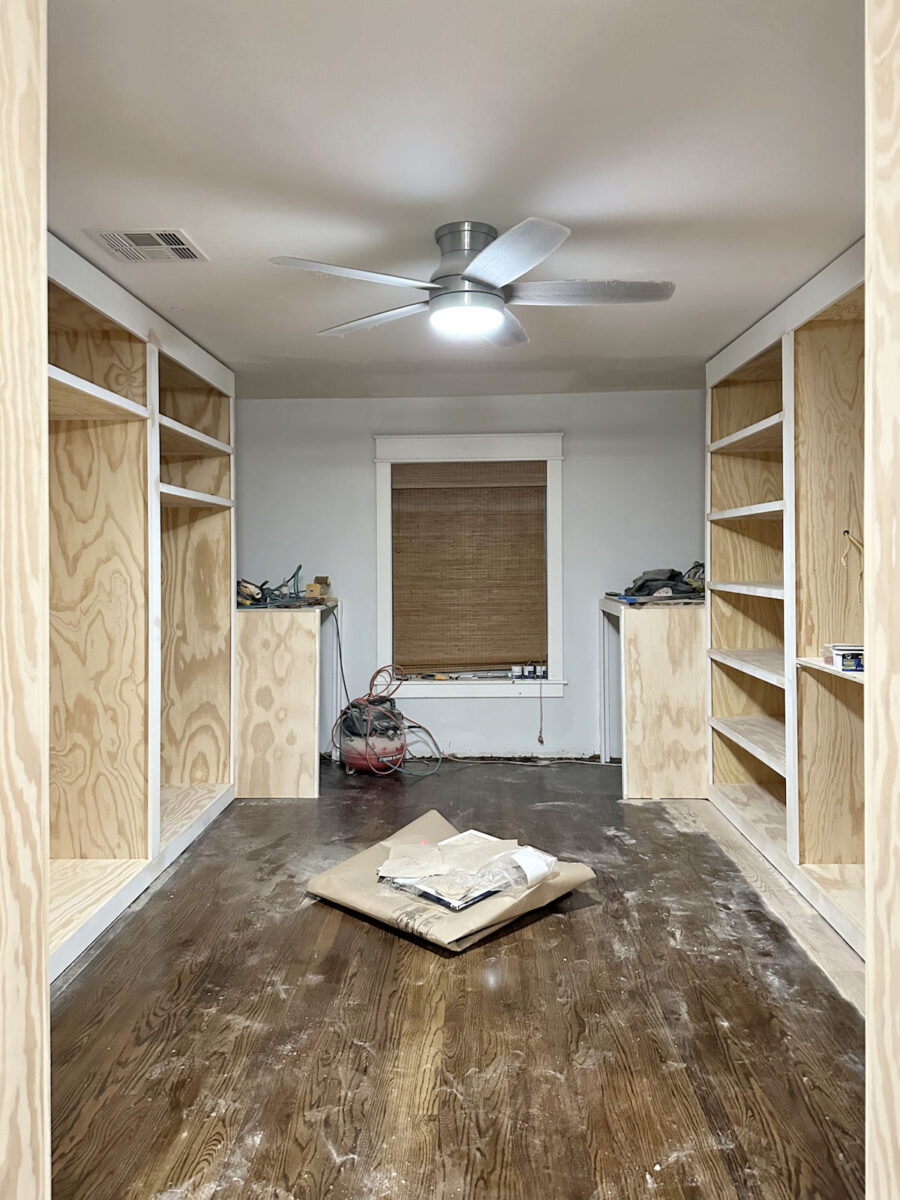
Before quitting smoking for the day, most clean. I will still need to give all the cabinets and shelves a quick cleaning before being able to prepare them, but that should not take long.
I have not finished the tedious preparation work. Everything still needs to be caught, and that will probably be a job of the whole day, or at least one more job of the day. It is also my least favorite part of any project, but it is such an important step to obtain that perfect finish (or as close as possible) that I effort.
As you can see, I still don’t get the beautiful molding. So today, my goal is to border on the rest of the floor around the cabinets to eliminate the current finish and then install all the beautiful molding (zócalos and crown moldings).
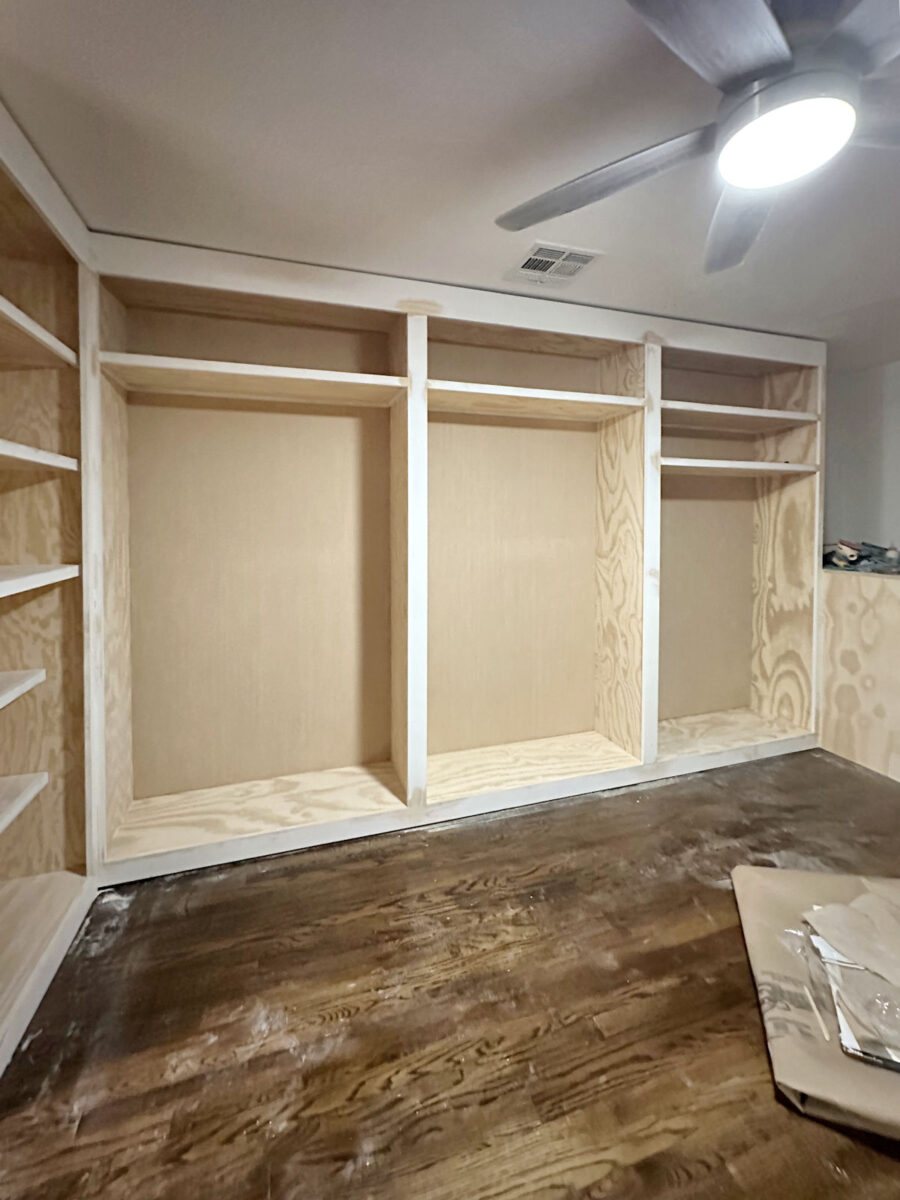
Once the nail holes in the beautiful molding are filled and sand, I will move on and prepare all the cabinets.
After the cabinets are printed and dry, then I will give the cabinets a fast sanding with hand sandpaper 220 and then I will grate everything.
The reason why I will prepare everything before caulbining is because using crowded wood and cleaning excess calafateo is much easier than wearing crowded in naked wood. When you use bare wood caulfateo, it tends to soak up the naked wood and grab, which makes it a little more difficult to obtain those beautiful and clean caphate lines.

Then, the primer creates a barrier between caulfateo and naked wood, preventing it from going back to wood and is much easier to get those beautiful and clean caphate lines.

It also finds that it is much easier to see the areas that must be paid after the cabinets are prepared. When I try to shut up naked wood, especially in a project as large as this, it is easy to ignore the areas, and then those past areas are overlooked are quite obvious after the primer continues. Then, when I caught the naked wood, and then prepare the project, I always find myself having to return and the calafateo areas that I overlooked. I just realized, after years of experience, that it is much easier to prepare everything first and then calafate.
But all the main sanding is made, and I am very happy that this great step is reviewed so that it can move on. I really hope that at the end of the weekend, at least you can have everything prepared. That is the goal. I would love to obtain paint in these cabinets this weekend, but I think it could be a target too high. Maybe, at least, I can obtain some paint samples in the cabinets and make my final color decision.
But let’s visit the floors again. Yesterday, during one of my breaks of the whole sanding, I found a Visualizer tool on the good website That allows you to load a photo and see how each sealant color will be seen in your room. Unfortunately, it will not allow you to choose the specific species of wood you have, but at least you can give a general idea of how each sealant would look. So here are the photos it generated.
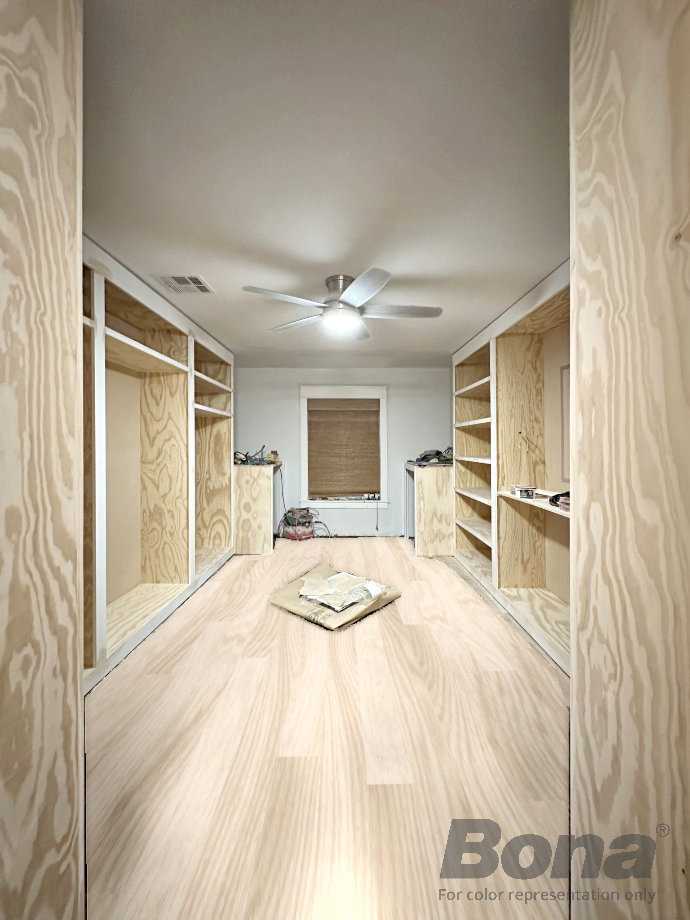
First, this is the Bona Nordicseal, which is the lighter and brighter color.
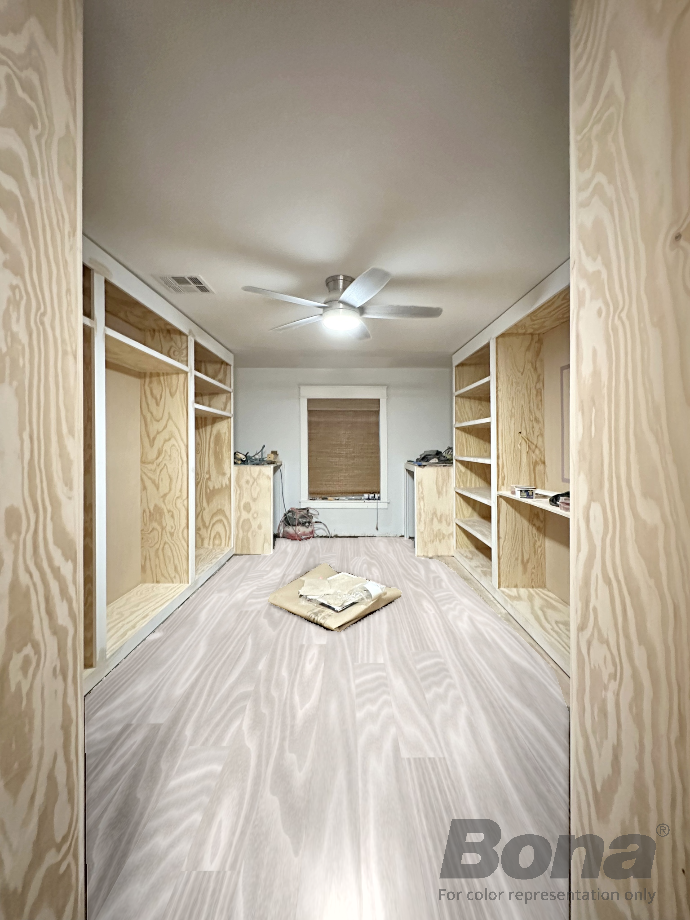
I really think this is too light and brilliant for our house. I enjoy seeing it in other houses, and I think it’s really beautiful. But for our house, I prefer a touch of heat to the wood.
The next is Bona Naturalseal. I think this still adds a touch of white and at the same time allows the color of natural wood to arrive.
I found many examples of the real world of this in Red Oak yesterday, and it is very beautiful in Red Oak, but also very light.

The next is Bona Clearsal. This is just a simple clear sealant that retains the natural color of wood.
I also found many examples of the real world of this in Oak network. It is also very beautiful.
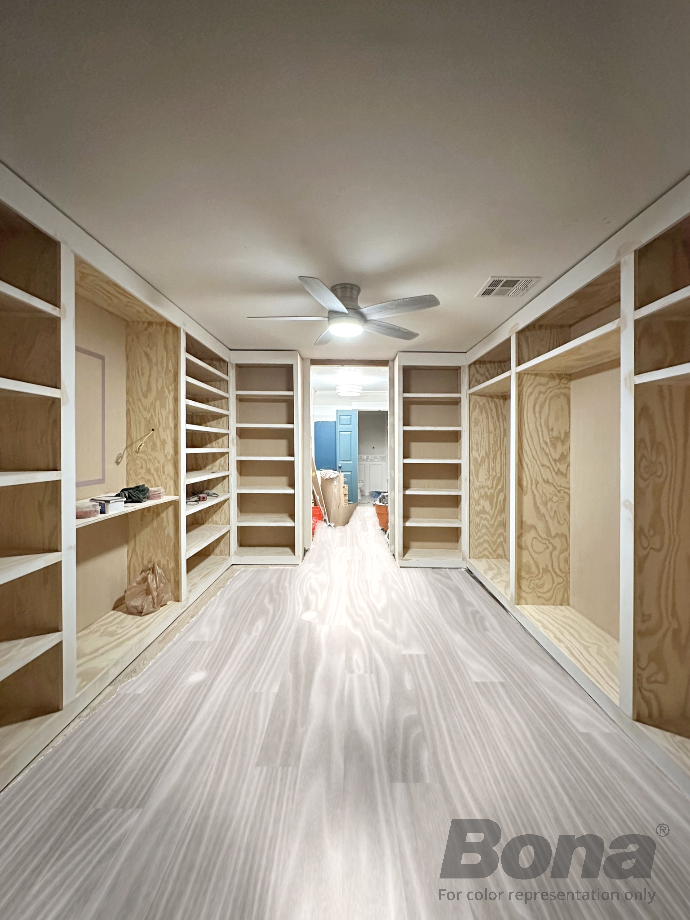
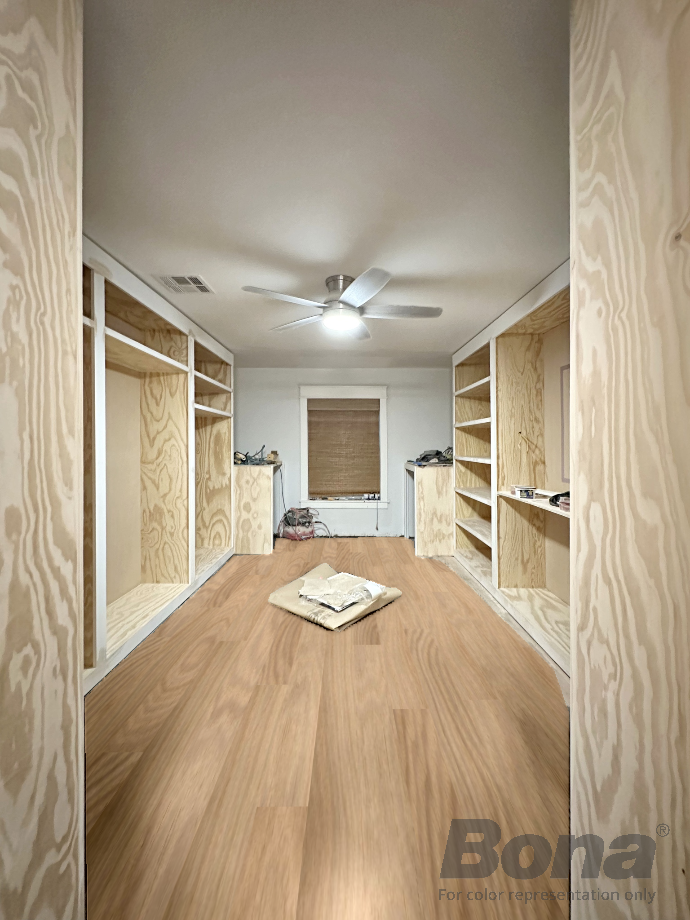
The next is Bona Classicseal. This is very popular and works very well with red oak.
I really love the appearance of this, but there is no guarantee that it looks exactly like this in my red oak floors.
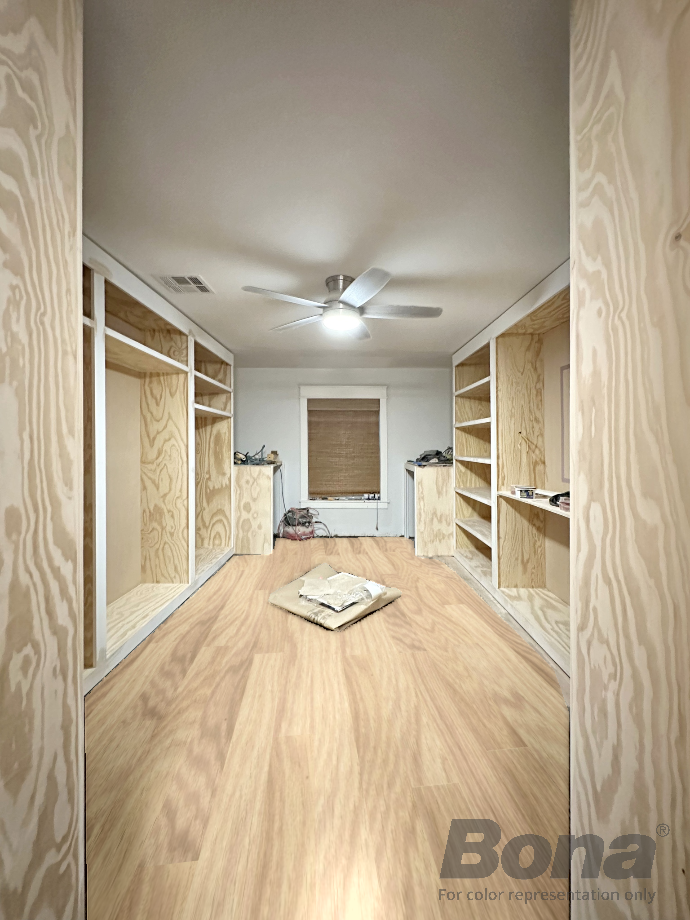
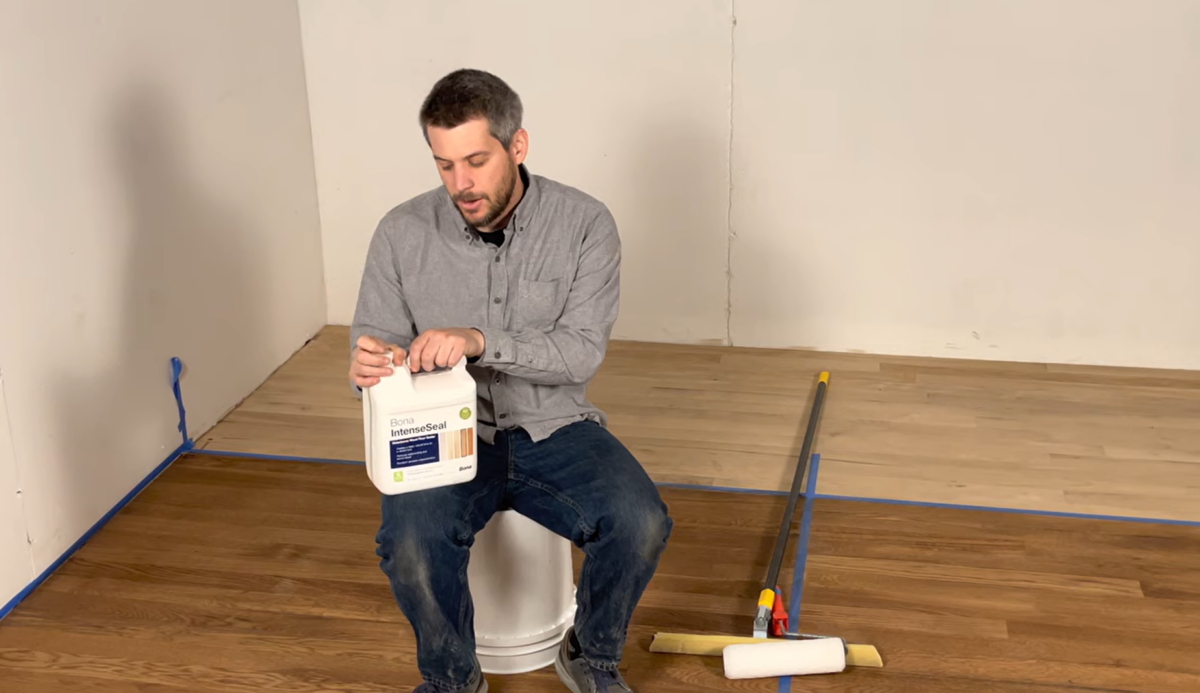
And finally, this is Bona Intensseal, which adds a slightly warmer tone to the wood.
In the floor visualizer, this is my favorite. But I have problems finding examples of the real world of this in red oak floors.

Simply leaving the images of the floor visualizer, my favorites are classicseal and the intense.
Based on the generated images, any of them would considerably lighten the floor of what I currently have, while I am given the warmth that I love.
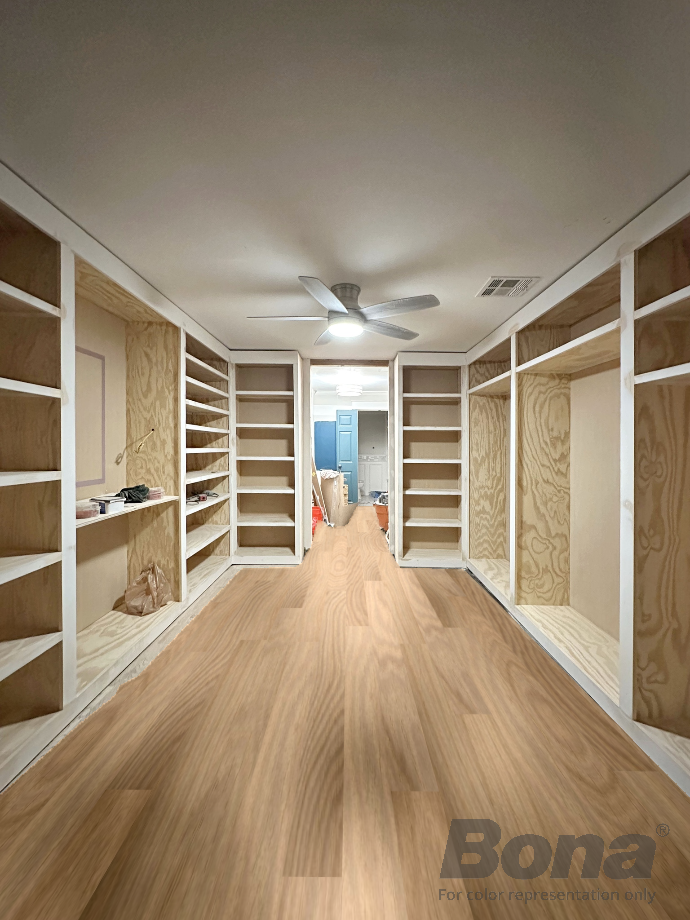
Here is my current apartment compared to the classic …
And here is my current apartment compared to the inteseal …
So I’m still looking for options and looking for more images from the real world of these products specifically used in Oak. Just this morning, I found This classicseal example used in Red OakAnd it looks really pretty. But it also looks different in each room they show depending on the lighting of the room, so it is really difficult to know what the real color is.
If I was only going to continue with those generated images, I would probably choose the inteseal. But that name only scares me a little. 😀 Sounds a bit dominant. I don’t want to go through all the problems to rebuild these floors just to end them too dark again. Yesterday I met this videoAnd it is using intesenal, but does not specify with which wooden species is working. It looks like a red oak for my not trained eye, and it also looks darker than the floor visualizer shows. I don’t want my dark floors.
Although my favorite with the floor visualizer is inteseal, I have the feeling that the classic is who I will end up going with. It will give me that warmth that I want without making the floors too dark. But I will give myself a couple more days to make my final decision. However, I really need to order my projects as soon as possible, because I cannot move my washing machine and dryer to the closet until the floors turn.
Update: I wanted to add the sample of the paint color that I plan to use along with the color of the floor. Here is the Valspar Matt on Monday color with the good classic floor sealant. I think this is beautiful !!! Oh my God, just seeing them together excites me a lot!


The additional decoration 2 is where I share my DIY and decoration trip while remodeling and decorption of the upper part of the 1948 fixer that my husband, Matt and I bought in 2013. Matt has more and cannot do physical work, so I do the majority of the work in the house for myself. You can learn more about me here.