
I finally started building my closet yesterday! When I made my order for all my plywood on Monday, I did not include the plywood for the washing machine and dryer (or cubbies, or its surroundings, as you want to call them) because I wanted to start building as soon as possible, and those were the only pieces that could have cut in the store and fit in my truck to bring them home that day. And then, after making my order and asking me if someone could cut a piece of plywood for me, they told me that their saw was not working at that time. 😀
He assured me that it would be fixed the next morning (Tuesday morning), so I decided to wait. But it was not fixed the next day. So, instead of waiting, I ended up going to Home Depot to cut it. They have exactly the same plywood that I bought Lowe’s for the rest of the closet.
All that to say that I have not yet received my delivery (it will arrive today between 9:30 am and 1:30 pm), but at least I had a plywood cutting sheet and suit it home to be able to build at least something. I just needed to see some kind of progress in this room.
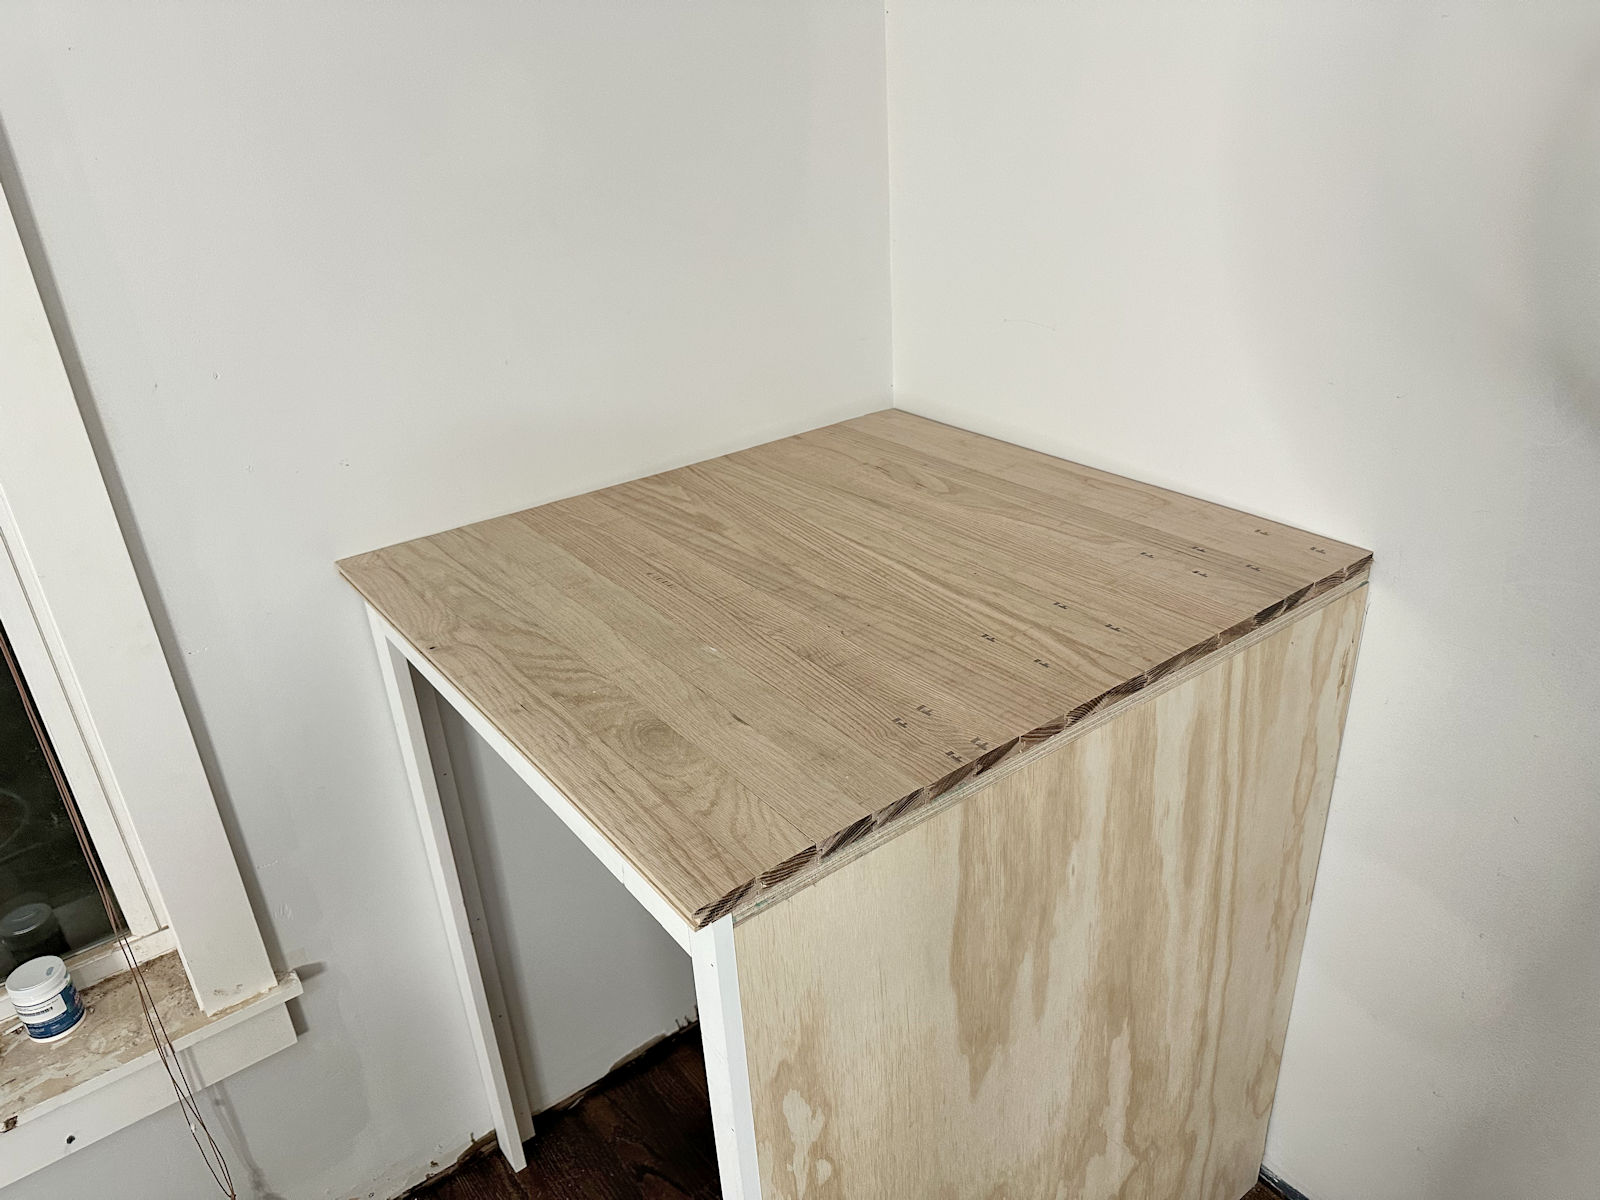
I only got the washing machine cabinet yesterday because I don’t want to build the dryer cabinet until the electrician has executed the new cable. The last thing I want to do is build something that makes your work more difficult and potentially cost me more money for that. But this is how the washing machine’s cabinet is seen so far.

The washing machine will actually excel a few inches from the cabinet, but at least we can get an image of how large and how far the washing machine and the dryer will go, and how much distance will there will be between them.
Building this cabinet was incredibly simple. I did not want to use a lot of plywood that I would not even show or serve a real purpose, so I did not use plywood on the back or the side against the side wall. Instead, I measured the finished width (33 inches) and then placed a 1 × 2 vertically in that measurement minus 3/4 ″ to leave space for the 3/4 ″ plywood that would serve as the side of the cabinet.

Then I measured the depth on the side wall and placed another 1 × 2 vertically in that measurement.

And then I attached two 1 × 2 more at the height of my plywood, which is 41 inches.

I watched the plywood on the lateral edge of the 1 × 2 to form the space for the washing machine.

And to complete the shape of the cabinet, I attached a piece of plywood on the top and nailed it in place, nailing it in the 1x2s on the side wall and the posterior wall, and on the upper edge of the plywood in the right side.

With each step, I used my square and frame level to make sure everything was square, level and plumber before placing them.

Then I cut the front of the cabinet with 1x3s and 1x2s. I used a 1 × 3 on the wall so that the cabinet opening clears the edge of the window and the window winding with an additional width, since the washing machine door will open in that direction. And I used a 1 × 2 on the other side because that is the side that will be shown, and I will cut all the cabinets of closet with 1x2s. My floor is not perfectly level, so I have the feeling that I will have to remove the upper edge and cut it a little in my table mountain range so that the washing machine adjusts.

I had been looking for different countertops, and I found myself gravitating Butcherblock. I was very close to buying Butcherblock from Lowe’s, and then I realized that I had many floors of the floor installation in the main bedroom suite. So I decided to use that instead since I have already paid it. I cut the pieces of hard wood from red oak over 33 inches wide and placed them at the top.

Actually, I have not yet attached to them because I need to find out if that superior adjustment piece must be cut before the countertop. Then, at this time, those boards are lying on top, but are not stuck or dive. And, of course, I will add a piece of 1 × 2 red oak to the front edge and to the lateral edge to finish the countertop.

I have also bought wooden whiter for countertops because I want them to be a natural wood color, so I need to eliminate part of the red oak red. I will address it later because I had to ask for the wooden bleach on Amazon. This is the one that uses (Affiliate link), and works very well.

So that’s what I get. But hey! At least I finally built something! 😀
I really wanted to build the other for the tintorero, but again, I don’t want to make the electrician’s work more difficult and may have to pay more. So I made my wait for that. But you, I’m so anxious to build! I am so excited that the rest of my supplies are delivered today at 1:30, and I hope to have the rest of the day to build.
I also need to cover the floors before starting big things. This was such a small and simple project that I didn’t care about the floors. But I will have to build the large cabinets within this room, and there is no way to build those large cabinets here just above my newly finished wooden floors. So I need to cover them and protect them before going further.
But I’m very happy to see some progress …finally. Now I just need to discover how I am going to get the washing machine and the dryer of the glazed terrace and move to this room. I am sure I will have to call reinforcements for that. I seriously doubt that I can do it alone. But they probably know myself well enough to know that at least I will try to do it before asking for help. 😀
The daily A2D:

The additional decoration 2 is where I share my DIY and decoration trip while remodeling and decorption of the upper part of the 1948 fixer that my husband, Matt and I bought in 2013. Matt has more and cannot do physical work, so I do the majority of the work in the house for myself. You can learn more about me here.